Chapter 06 - Drawing a triangle
In this chapter we will finally be rendering a shape, developing the required structs and functions to load data to the GPU and using the graphics pipeline. We will start, as in the previous chapters, by explaining the elements that we will need later on to use together to draw something to the screen.
You can find the complete source code for this chapter here.
Buffers
If we want to display 3D models, we need first to load all the vertices information that define them (positions, texture coordinates, indices, etc.). All that information needs to be stored in buffers accessible by the GPU. A buffer in Vulkan is basically a bunch of bytes that can be used for whatever we want, from storing vertices to storing data used for computation. As usual, we will create a new struct named VkBuffer to manage them. (Remember to add a new file named vkBuffer.zig to the mod.zig: pub const buf = @import("vkBuffer.zig");). Let's examine its attributes and the create function used to instantiate it:
const vulkan = @import("vulkan");
const vk = @import("mod.zig");

pub const VkBuffer = struct {
    size: u64,
    buffer: vulkan.Buffer,
    memory: vulkan.DeviceMemory,

    pub fn create(vkCtx: *const vk.ctx.VkCtx, size: u64, bufferUsage: vulkan.BufferUsageFlags, memFlags: vulkan.MemoryPropertyFlags) !VkBuffer {
        const createInfo = vulkan.BufferCreateInfo{
            .size = size,
            .usage = bufferUsage,
            .sharing_mode = vulkan.SharingMode.exclusive,
        };
        const buffer = try vkCtx.vkDevice.deviceProxy.createBuffer(&createInfo, null);

        const memReqs = vkCtx.vkDevice.deviceProxy.getBufferMemoryRequirements(buffer);

        const allocInfo = vulkan.MemoryAllocateInfo{
            .allocation_size = memReqs.size,
            .memory_type_index = try vkCtx.findMemoryTypeIndex(memReqs.memory_type_bits, memFlags),
        };
        const memory = try vkCtx.vkDevice.deviceProxy.allocateMemory(&allocInfo, null);

        try vkCtx.vkDevice.deviceProxy.bindBufferMemory(buffer, memory, 0);

        return .{
            .size = size,
            .buffer = buffer,
            .memory = memory,
        };
    }
    ...
};
**File: src/eng/vk/vkBuffer.zig**
The create function just receives the VkCtx that will be used to create this buffer, its size, a parameter named bufferUsage which will state what this buffer should be used for and a the memory flags. This last parameter is use to set the requested memory properties that the data associated to this buffer should use. In order to create a Vulkan buffer we need to setup a structure named BufferCreateInfo, which defines the following attributes:
size: The number of bytes that the buffer will hold.usage: It specifies the allowed usages of the buffer. We can specify that this buffer can be used for transfer commands (for example to uses as source in buffer copy operations), as a destination transfer, for uniforms. etc. This will be received in thecreatefunction of theVulkanBufferstruct through an argument with the same name.sharing_mode: If set tovulkan.SharingMode.exclusive(VK_SHARING_MODE_EXCLUSIVE), it can only be accessed by a queue family at a time. Setting tovulkan.SharingMode.concurrent(VK_SHARING_MODE_CONCURRENT) allows the buffer contents to be accessed by more than one queue family at a time. Concurrent mode incurs performance penalties, so we will just use exclusive mode.
With that structure we can invoke the createBuffer function to create the buffer handle. It is important to remark, that this call does not allocate the memory for the buffer, we just create the handle, we will need to manually allocate that memory and associate that to the buffer later on. Therefore the next thing we do is to retrieve the memory requirements of the new created buffer, by calling the getBufferMemoryRequirements function.
The next thing to do is to allocate the memory. Again, in order to achieve that, we need to setup a structure named MemoryAllocateInfo, which defines the following attributes:
allocation_size: It will hold the size of the memory to be allocated in bytes.memory_type_index: It will hold the memory type index to be used. The index refers to the memory types available in the device.
In order to fill the memory_type_index we call the findMemoryTypeIndex function from the VkCtx struct, which is defined like this:
pub const VkCtx = struct {
    ...
    pub fn findMemoryTypeIndex(self: *const VkCtx, memTypeBits: u32, flags: vulkan.MemoryPropertyFlags) !u32 {
        const memProps = self.vkInstance.instanceProxy.getPhysicalDeviceMemoryProperties(self.vkPhysDevice.pdev);
        for (memProps.memory_types[0..memProps.memory_type_count], 0..) |mem_type, i| {
            if (memTypeBits & (@as(u32, 1) << @truncate(i)) != 0 and mem_type.property_flags.contains(flags)) {
                return @truncate(i);
            }
        }

        return error.NoSuitableMemoryType;
    }
};
**File: src/eng/vk/vkCtx.zig**
The memTypeBits attribute is a bit mask which defines the supported memory types of the physical device. A bit set to 1 means that the type of memory (associated to that index) is supported. The flags attribute is the type of memory that we need (for example if that memory will be accessed only by the GPU or also by the application). This function basically iterates over all the memory types, checking if that memory index (first condition) is supported by the device and if that it meets the requested type (second condition). This function basically returns the memory type index most suitable for the requested conditions.
Now we can go back to the VkBuffer create function and invoke the allocateMemory function to allocate the memory. After that we can get the finally allocated size and get a handle to that chunk of memory.
Now we need to link the allocated memory with the buffer handle, this is done by calling the bindBufferMemory function.
The create function is now finished. The next function are the usual cleanup one:
pub const VkBuffer = struct {
    ...
    pub fn cleanup(self: *const VkBuffer, vkCtx: *const vk.ctx.VkCtx) void {
        vkCtx.vkDevice.deviceProxy.destroyBuffer(self.buffer, null);
        vkCtx.vkDevice.deviceProxy.freeMemory(self.memory, null);
    }
    ...
};
**File: src/eng/vk/vkBuffer.zig**
To complete the struct, we define two functions to map and unmap the memory associated to the buffer so it can be accessed from our application (if they have been created with the flag host_visible_bit (VK_MEMORY_PROPERTY_HOST_VISIBLE_BIT), more on this later on). The map function just calls the mapMemory function which returns a handle that can be used to get a buffer to read / write its contents. The unMap function just calls the unmapMemory to unmap the previously mapped buffer memory:
pub const VkBuffer = struct {
    ...
    pub fn map(self: *const VkBuffer, vkCtx: *const vk.ctx.VkCtx) !?*anyopaque {
        return try vkCtx.vkDevice.deviceProxy.mapMemory(self.memory, 0, vulkan.WHOLE_SIZE, .{});
    }

    pub fn unMap(self: *const VkBuffer, vkCtx: *const vk.ctx.VkCtx) void {
        vkCtx.vkDevice.deviceProxy.unmapMemory(self.memory);
    }
};
**File: src/eng/vk/vkBuffer.zig**
Vertex description
We have now created the buffers required to hold the data for vertices, the next step is to describe to Vulkan the format of that data. As you can guess, depending on the specific case, the structure of that data may change, we may have just position coordinates, or position with texture coordinates and normals, etc. Some of the vulkan elements that we will define later on, will need a handle to that structure. In order to support this, we will create a struct named VtxBuffDesc which is defined like this (inside the renderScn.zig file):
pub const VtxBuffDesc = struct {
    pub const binding_description = vulkan.VertexInputBindingDescription{
        .binding = 0,
        .stride = @sizeOf(VtxBuffDesc),
        .input_rate = .vertex,
    };

    pub const attribute_description = [_]vulkan.VertexInputAttributeDescription{
        .{
            .binding = 0,
            .location = 0,
            .format = .r32g32b32_sfloat,
            .offset = @offsetOf(VtxBuffDesc, "pos"),
        },
    };

    pos: [3]f32,
};
**File: src/eng/renderScn.zig**
We define several structures required for Vulkan to understand how our vertices will be used:
VertexInputAttributeDescription: It is used to describe each vertex attribute.VertexInputBindingDescription: It is used to specify if the boundaries of each vertex "package" and how it will consumed (per instance or per vertex).
We need to fill up as many attribute descriptors as input variables describing the input we will have in our shaders. In our case, by now, we will just use one attribute for the position, so we only include one description. The attributes of VertexInputAttributeDescription are:
binding: The binding number associated to this vertex description. This will be used later on the shaders so we can use several vertices descriptions independently associated to different binding points.location: The input location used in the shader for this attribute.format: The format of this attribute, in this case we are saying that we will be using three 32 bit signed floats.offset: The relative offset in bytes for this attribute when processing one vertex element. The buffer will contain many vertices. Each of them can have different attributes (positions, texture coordinates). This offset refers to the position of this attribute to the beginning of each vertex element. This is the first attribute so it should be0.
After that, we will fill up the binding description. The attributes of VertexInputBindingDescription are:
binding: The same meaning as in the vertices attributes description.stride: The distance in bytes from two consecutive elements in the buffer. In our case, we are using 32 bit floats for the positions (4 bytes each) and three position components (x, y, z).inputRate: It specifies the rate at which vertex attributes are pulled from the underlying buffer. It can have two possible values:vertex(VK_VERTEX_INPUT_RATE_VERTEX): Values will be extracted for each vertex index. That is, when consuming an index we will get one element from the buffer. This is the regular case when drawing a mesh, the vertex data is associated to a specific index and will be consumed accordingly.instance(VK_VERTEX_INPUT_RATE_INSTANCE): Values will be extracted for each instance index. This will be the case used for instanced rendering, where with a single buffer defining the common attributes (mesh definition) we can draw many models with a single draw call. The buffer will hold common data for all the models and per-instance data, therefore we will need to combine the two types of input rate.
Loading the data
We have created the structures that will hold the data for our models (VkBuffer) and the ones that define their format (VtxBuffDesc). We are now ready to load the data into the GPU. In essence, we need to load the data into two buffers, one for the positions of the vertices and another one for the indices of the triangle coordinates that wll be used to actually form the triangles. We will define a new struct named VulkanModel which will hold the information for 3D models. For now, it will hold the buffers for the different meshes that compose a 3D model. In next chapters it will be extended to support richer structures. At this moment a model is just a collection of meshes which will hold the references to buffers that contain positions data and their indices. This struct will also define the functions to populate those structures. This will be defined in a new file named modelsCache.zig which you should add to the mod.zig file like this: pub const mcach = @import("modelsCache.zig"); under the src/eng folder. The VtxBuffDesc struct is quite simple:
const eng = @import("mod.zig");
const std = @import("std");
const vk = @import("vk");
const vulkan = @import("vulkan");

const log = std.log.scoped(.eng);

pub const VulkanModel = struct {
    id: []const u8,
    meshes: std.ArrayList(VulkanMesh),

    pub fn cleanup(self: *VulkanModel, allocator: std.mem.Allocator, vkCtx: *const vk.ctx.VkCtx) void {
        for (self.meshes.items) |mesh| {
            mesh.cleanup(vkCtx);
        }
        self.meshes.deinit(allocator);
    }
};
**File: src/eng/modelsCache.zig**
This struct just stores a list of meshes, defined by the VulkanMesh struct, which contains the buffers associated to the vertices positions and the indices.
The VulkanMesh struct (defined also inside the modelsCache.zig file) is quite simple:
pub const VulkanMesh = struct {
    buffIdx: vk.buf.VkBuffer,
    buffVtx: vk.buf.VkBuffer,
    id: []const u8,
    numIndices: usize,

    pub fn cleanup(self: *const VulkanMesh, vkCtx: *const vk.ctx.VkCtx) void {
        self.buffVtx.cleanup(vkCtx);
        self.buffIdx.cleanup(vkCtx);
    }
};
**File: src/eng/modelsCache.zig**
It is just a record which contains an identifier, the vertices and indices buffers and the number of indices.
We will see later on how we can load that data into the GPU from raw data. That raw data is encapsulated in two structs named ModelData and MeshData which are defined like this (They will be defined in the file modelData.zig which you should add to the mod.zig file like this: pub const mdata = @import("modelData.zig"); under the src/eng folder):
pub const MeshData = struct {
    id: []const u8,
    vertices: []const f32,
    indices: []const u32,
};

pub const ModelData = struct {
    id: []const u8,
    meshes: []const MeshData,
};
**File: src/eng/modelData.zig**
As you can see the ModelData and MeshData are quite simple just structs which hold list of meshes which are arrays of floats and indices. Just raw model data.
Now it is the turn to see how we can pass from raw data to populate the buffers that can be used by the GPU. This will be done in the ModelsCache struct, which will store references to VulkanModels instances by id and will encapsulate all the transformation operations. It starts like this:
pub const ModelsCache = struct {
    modelsMap: std.StringHashMap(VulkanModel),

    pub fn cleanup(self: *ModelsCache, allocator: std.mem.Allocator, vkCtx: *const vk.ctx.VkCtx) void {
        var iter = self.modelsMap.iterator();
        while (iter.next()) |entry| {
            allocator.free(entry.key_ptr.*);
            entry.value_ptr.*.cleanup(allocator, vkCtx);
        }
        self.modelsMap.deinit();
    }

    pub fn create(allocator: std.mem.Allocator) ModelsCache {
        const modelsMap = std.StringHashMap(VulkanModel).init(allocator);
        return .{
            .modelsMap = modelsMap,
        };
    }
    ...
};
**File: src/eng/modelsCache.zig**
As you can see all the VulkanModels instances will be stored in a StringHashMap indexed by its identifier. As it has been shown before, each VulkanMesh instance has two buffers, one for positions and another one for the indices. These buffers will be used by the GPU while rendering but we need to access them from the CPU in order to load the data into them. We could use buffers that are accessible from both the CPU and the GPU, but the performance would be worse than buffers that can only used by the GPU. So, how do we solve this? The answer is by using intermediate buffers:
- We first create an intermediate buffer (or staging buffer) that can be accessed both by the CPU and the GPU. This will be our source buffer.
- We create another buffer that can be accessed only from the GPU. This will be our destination buffer.
- We load the data into the source buffer (the intermediate buffer) from our application (CPU).
- We copy the source buffer into the destination buffer.
- We destroy the source buffer (the intermediate buffer). It is not needed anymore.
This will be done in the init function inside ModelsCache struct. Keep in mind, that it should be used at the initialization stage as a bulk loading mechanism (more efficient). Copying from one buffer to another implies submitting a transfer command to a queue and waiting for it to complete. Instead of submitting these operations one by one, we can record all these commands into a single VkCmdBuff, submit them just once and also wait once for the commands to be finished. This will be much more efficient than submitting small commands one at a time.
The init function starts like this:
pub const ModelsCache = struct {
    ...
    pub fn init(
        self: *ModelsCache,
        allocator: std.mem.Allocator,
        vkCtx: *const vk.ctx.VkCtx,
        cmdPool: *vk.cmd.VkCmdPool,
        vkQueue: vk.queue.VkQueue,
        initData: *const eng.engine.InitData,
    ) !void {
        log.debug("Loading {d} model(s)", .{initData.models.len});

        const cmdBuff = try vk.cmd.VkCmdBuff.create(vkCtx, cmdPool, true);

        var srcBuffers = try std.ArrayList(vk.buf.VkBuffer).initCapacity(allocator, 1);
        defer srcBuffers.deinit(allocator);
        try cmdBuff.begin(vkCtx);
        const cmdHandle = cmdBuff.cmdBuffProxy.handle;
        ...
    }
    ...
};
**File: src/eng/modelsCache.zig**
The function starts by creating a list, named srcBuffers, that will contain the CPU accessible buffers (the staging buffers), so we can destroy them after the copy operations have finished. It also creates a new VkCmdBuff which will be used to record the copy operations that involve the different buffers used and start the recording. After that, we start the recording. The next step is to iterate over the models and their associated meshes:
pub const ModelsCache = struct {
    ...
    pub fn init(
        self: *ModelsCache,
        allocator: std.mem.Allocator,
        vkCtx: *const vk.ctx.VkCtx,
        cmdPool: *vk.cmd.VkCmdPool,
        vkQueue: vk.queue.VkQueue,
        initData: *const eng.engine.InitData,
    ) !void {
        ...
        for (initData.models) |*modelData| {
            var vulkanMeshes = try std.ArrayList(VulkanMesh).initCapacity(allocator, modelData.meshes.len);

            for (modelData.meshes) |meshData| {
                const verticesSize = meshData.vertices.len * @sizeOf(f32);
                const srcVtxBuffer = try vk.buf.VkBuffer.create(
                    vkCtx,
                    verticesSize,
                    vulkan.BufferUsageFlags{ .transfer_src_bit = true },
                    vulkan.MemoryPropertyFlags{ .host_visible_bit = true, .host_coherent_bit = true },
                );
                try srcBuffers.append(allocator, srcVtxBuffer);
                const dstVtxBuffer = try vk.buf.VkBuffer.create(
                    vkCtx,
                    verticesSize,
                    vulkan.BufferUsageFlags{ .vertex_buffer_bit = true, .transfer_dst_bit = true },
                    vulkan.MemoryPropertyFlags{ .device_local_bit = true },
                );

                const dataVertices = try srcVtxBuffer.map(vkCtx);
                const gpuVertices: [*]f32 = @ptrCast(@alignCast(dataVertices));
                @memcpy(gpuVertices, meshData.vertices[0..]);
                srcVtxBuffer.unMap(vkCtx);

                const indicesSize = meshData.indices.len * @sizeOf(u32);
                const srcIdxBuffer = try vk.buf.VkBuffer.create(
                    vkCtx,
                    indicesSize,
                    vulkan.BufferUsageFlags{ .transfer_src_bit = true },
                    vulkan.MemoryPropertyFlags{ .host_visible_bit = true, .host_coherent_bit = true },
                );
                try srcBuffers.append(allocator, srcIdxBuffer);
                const dstIdxBuffer = try vk.buf.VkBuffer.create(
                    vkCtx,
                    indicesSize,
                    vulkan.BufferUsageFlags{ .index_buffer_bit = true, .transfer_dst_bit = true },
                    vulkan.MemoryPropertyFlags{ .device_local_bit = true },
                );

                const dataIndices = try srcIdxBuffer.map(vkCtx);
                const gpuIndices: [*]u32 = @ptrCast(@alignCast(dataIndices));
                @memcpy(gpuIndices, meshData.indices[0..]);
                srcIdxBuffer.unMap(vkCtx);

                const vulkanMesh = VulkanMesh{
                    .buffIdx = dstIdxBuffer,
                    .buffVtx = dstVtxBuffer,
                    .id = meshData.id,
                    .numIndices = meshData.indices.len,
                };
                try vulkanMeshes.append(allocator, vulkanMesh);

                recordTransfer(vkCtx, cmdHandle, &srcVtxBuffer, &dstVtxBuffer);
                recordTransfer(vkCtx, cmdHandle, &srcIdxBuffer, &dstIdxBuffer);
            }

            const vulkanModel = VulkanModel{ .id = modelData.id, .meshes = vulkanMeshes };
            try self.modelsMap.put(try allocator.dupe(u8, modelData.id), vulkanModel);
        }

        try cmdBuff.end(vkCtx);
        try cmdBuff.submitAndWait(vkCtx, vkQueue);

        for (srcBuffers.items) |vkBuff| {
            vkBuff.cleanup(vkCtx);
        }

        log.debug("Loaded {d} model(s)", .{initData.models.len});
    }
    ...
};
**File: src/eng/modelsCache.zig**
For each of these meshes, we get the vertices and the indices and record the commands that will copy from the staging buffer to the destination buffer. The stating buffer for vertices is named srcVtxBuffer.
This buffer is created with the transfer_src_bit flag (VK_BUFFER_USAGE_TRANSFER_SRC_BIT) as its usage parameter. With this flag we state that this buffer can be used as the source of a transfer command. For the memFlags attribute we use the combination of two flags:
host_visible_bit(VK_MEMORY_PROPERTY_HOST_VISIBLE_BIT): This means that the memory allocated by this buffer can be mapped and accessed by the CPU. This is what we need in order to populate with the mesh data.host_coherent_bit(VK_MEMORY_PROPERTY_HOST_COHERENT_BIT): This means that we do not need to execute flushing commands when the CPU writes to this buffer or vice versa.
The GPU-only accessible buffer for vertices is named dstVtxBuffer. It is created with the transfer_dst_bit flag (VK_BUFFER_USAGE_TRANSFER_DST_BIT) as its usage parameter. With this flag we state that this buffer can used as the destination of a transfer command. We also set the flag vertex_buffer_bit (VK_BUFFER_USAGE_VERTEX_BUFFER_BIT) since it will be used for handling vertices data. For the memFlags attribute we use the device_local_bit (VK_MEMORY_PROPERTY_DEVICE_LOCAL_BIT) flag which states that the memory allocated by this buffer will be used by the GPU.
Once the buffers have been created we need to populate the source buffer. In order to do that, we need to map that memory in order to get a pointer to it so we can upload the data. This is done by calling the map function on the buffer instance. Now we have a pointer to the memory of the buffer which we will use to load the positions. After we have finished copying the data to the source buffer we call the unMap function over the buffer.
When we have processed all the meshes from all the models, we finish the recording and submit the commands to the queue waiting for them to be processed.
The recordTransfer function is defined like this:
fn recordTransfer(
vkCtx: *const vk.ctx.VkCtx,
cmdHandle: vulkan.CommandBuffer,
srcBuff: *const vk.buf.VkBuffer,
dstBuff: *const vk.buf.VkBuffer,
) void {
const copyRegion = [_]vulkan.BufferCopy{.{
.src_offset = 0,
.dst_offset = 0,
.size = srcBuff.size,
}};
vkCtx.vkDevice.deviceProxy.cmdCopyBuffer(cmdHandle, srcBuff.buffer, dstBuff.buffer, ©Region);
}
**File: src/eng/modelsCache.zig**It first defines a copy region, by filling up a BufferCopy array, which will have the whole size of the staging buffer. Then we record the copy command, by calling the cmdCopyBuffer function. We do this for vertices and indices buffers.
Graphics pipeline overview
A graphics pipeline is a model which describes the steps required to render graphics into a screen. In Vulkan this is modeled using a data structure. You can think of a pipeline as a sequence of stages which are traversed by the recorded commands as they are executed. Those steps can be classified as fixed and programmable. Fixed steps can only be controlled by setting up some parameters at pipeline creation time. Programmable steps are defined by programs called shaders. The following picture depicts Vulkan graphics pipeline.

Description of the stages (NOTE: graphics pipeline in Vulkan can also work in mesh shading mode, in this case we are referring to primitive shading mode. More information in the Vulkan [specification]((https://www.khronos.org/registry/vulkan/specs/1.1-extensions/html/vkspec.html#pipelines):
- Input Assembler: It is the responsible of assembling vertices to form graphics primitives such as triangles.
- Vertex shader: In this stage we transform the vertices received as inputs (positions, normals, texture coordinates, etc.). It is a programmable stage.
- Tesselation and geometry shader stages can generate multiple primitives from a single input primitive or modify them received from previous stages. These stages are also programmable through shaders.
- Rasterization: This stage transforms primitives into fragments (pixels) that can be displayed on a 2D image.
- Fragment shader: Processes the fragments from the rasterization stage determining the values that will be written into the frame buffer output attachments. This is also a programmable stage which usually outputs the color for each pixel.
- Blending: Controls how different fragments can be mixed over the same pixel handling aspects such as transparencies and color mixing.
One important topic to understand when working with Vulkan pipelines is that they are almost immutable. Unlike OpenGL, we can't modify at run time the properties of a graphics pipeline. Almost any change that we want to make implies the creation of a new pipeline. For example, in OpenGL it is common to modify at runtime certain parameters that control how transparencies are handled (blending) or if the depth-testing is enabled. In OpenGL we can modify those parameters at run time with no restrictions. (The reality is that under the hood, our driver is switching between pipelines definitions that meet those settings). In Vulkan, however, we will need to define multiple pipelines if we want to change those settings while rendering and switch between them manually.
Shaders
Prior to starting to define the pipeline we will write the code for handling shaders. As it has just been said above, shaders allow us to control, using code, the pipeline stages that are programmable. If you come from OpenGL, you are used to program the shaders in GLSL language, if you come from DirectX you will use HLSL language. In this case, Vulkan uses a different approach and uses a binary format called SPIR-V. Both GLSL and HLSL are human readable languages, which imposes extra overhead on the drivers that need to parse those formats and convert their instructions into something that can be used by the GPU. Another issue with these formats is the different implementation behaviors that can arise when different vendors perform different assumptions, since the complexity of the parsers required leave room for different interpretations. Vulkan, by using a binary format, reduces the complexity on the drivers, reducing also the time required to load them. As a bonus, you can still develop your shaders in your favorite language (GLSL or HLSL) and transform them to SPIR-V using an external compiler. In this book, we will use GLSL and will compile the shaders when building the code in the build.zig file:
const Shader = struct {
    path: []const u8,
    stage: []const u8,
};

pub fn build(b: *std.Build) void {
    ...
    // Shaders
    const shaders = [_]Shader{
        .{ .path = "res/shaders/scn_vtx.glsl", .stage = "vertex" },
        .{ .path = "res/shaders/scn_frg.glsl", .stage = "fragment" },
    };
    for (shaders) |shader| {
        std.log.debug("Compiling [{s}]", .{shader.path});
        const outputPath = b.fmt("{s}.spv", .{shader.path});
        const stage = b.fmt("-fshader-stage={s}", .{shader.stage});
        const compFragment = b.addSystemCommand(&[_][]const u8{
            "glslc",
            "--target-env=vulkan1.3",
            stage,
            "-g", // Debug
            "-o",
            outputPath,
            shader.path,
        });
        b.getInstallStep().dependOn(&compFragment.step);
    }

    b.installArtifact(exe);
    ...
}
**File: build.zig**
In this chapter we will use two shaders (scn_vtx.glsl and scn_frg.glsl). We will compile them using glslc command. If you have already installed Vulkan SDK, you may already have the glslc command. If not, you may need to install it. For example in Linux (Debian based distribution), just execute sudo apt install glslc.
Pipeline
The next step is to write the code that supports graphic pipelines creation. Prior to talking about pipelines specifically, we will talk about the pipeline cache. As mentioned before, while working with Vulkan, it is very common to have multiple pipelines. Pipelines are almost immutable, so any variant on the setup of the different stages requires a new pipeline instance.
We will encapsulate pipeline creation code in the vkPipeline.zig (Remember to include it in the src/eng/vk/mod.zig file: pub const pipe = @import("vkPipeline.zig");). It starts like this:
const std = @import("std");
const vulkan = @import("vulkan");
const vk = @import("mod.zig");

pub const ShaderModuleInfo = struct {
    module: vulkan.ShaderModule,
    stage: vulkan.ShaderStageFlags,
};

pub const VkPipelineCreateInfo = struct {
    colorFormat: vulkan.Format,
    modulesInfo: []ShaderModuleInfo,
    useBlend: bool,
    vtxBuffDesc: VtxBuffDesc,
};

const VtxBuffDesc = struct {
    binding_description: vulkan.VertexInputBindingDescription,
    attribute_description: []vulkan.VertexInputAttributeDescription,
};

pub const VkPipeline = struct {
    pipeline: vulkan.Pipeline,
    pipelineLayout: vulkan.PipelineLayout,

    pub fn create(allocator: std.mem.Allocator, vkCtx: *const vk.ctx.VkCtx, createInfo: *const VkPipelineCreateInfo) !VkPipeline {
        const pssci = try allocator.alloc(vulkan.PipelineShaderStageCreateInfo, createInfo.modulesInfo.len);
        defer allocator.free(pssci);

        for (pssci, 0..) |*info, i| {
            info.* = .{
                .stage = createInfo.modulesInfo[i].stage,
                .module = createInfo.modulesInfo[i].module,
                .p_name = "main",
            };
        }
        ...
    }
    ...
};
**File: src/eng/vk/vkPipeline.zig**
The ShaderModuleInfo struct will hold shader modules that need to be used by the pipeline (we will se later on how to create them). The VkPipelineCreateInfo will be used to parametrize pipeline creation. It is composed by the following attributes:
colorFormat: The color format to be used when rendering in this pipeline.modulesInfo: The list of shader modules.useBlend: When the pipeline will be configured to support alpha blending.vtxBuffDesc: It will contain the vertex attribute description.
The first thing we do is to create as many PipelineShaderStageCreateInfo structures as shader modules we have. For each of them we set the stage that it should be applied to, the handle to the module itself and the name of the entry point of the shader for that stage (p_name). In our case we will use main.
After that, we set-up the input assembly stage:
pub const VkPipeline = struct {
    ...
    pub fn create(allocator: std.mem.Allocator, vkCtx: *const vk.ctx.VkCtx, createInfo: *const VkPipelineCreateInfo) !VkPipeline {
        ...
        const piasci = vulkan.PipelineInputAssemblyStateCreateInfo{
            .topology = .triangle_list,
            .primitive_restart_enable = vulkan.Bool32.false,
        };
        ...
    }
    ...
};
**File: src/eng/vk/vkPipeline.zig**
The input assembly stage takes a set of vertices and produces a set of primitives. The primitives to be produced are defined in the topology attribute. In our case, we will generate a list of triangles: triangle_list (VK_PRIMITIVE_TOPOLOGY_TRIANGLE_LIST). We could generate other types such as points: point_list (VK_PRIMITIVE_TOPOLOGY_POINT_LIST), lines: line_list (VK_PRIMITIVE_TOPOLOGY_LINE_LIST), triangle strips: triangle_strip (VK_PRIMITIVE_TOPOLOGY_TRIANGLE_STRIP), etc. For our examples we can leave that parameter fixed to the triangle_list value.
The next step is to define how many view ports and scissors we are going to use. The view port describes the region from the output attachments that we will be using for rendering (normally we will use the whole size of those buffers). The view port defines the transformation from normalized coordinates to screen coordinates. Since it is a transformation, the rendered image will be stretched or enlarged to fit the dimensions of the view port. The scissor defines a rectangle where outputs can be made, any pixel that lies outside that region will be discarded. Scissors are not transformations, they simply cut out regions that do not fit their dimensions. In our case, we will be using just one view port and one scissor (we need at least one).
pub const VkPipeline = struct {
    ...
    pub fn create(allocator: std.mem.Allocator, vkCtx: *const vk.ctx.VkCtx, createInfo: *const VkPipelineCreateInfo) !VkPipeline {
        ...
        const pvsci = vulkan.PipelineViewportStateCreateInfo{
            .viewport_count = 1,
            .p_viewports = null,
            .scissor_count = 1,
            .p_scissors = null,
        };
        ...
    }
    ...
};
**File: src/eng/vk/vkPipeline.zig**
We will be using dynamic viewports and scissors, therefore, although we have set the count values to 1 we set the p_viewports and p_scissors to null. This will allow to set the dimensions for viewport and scissor when recording graphic commands. If we were not using dynamic viewports and scissors, any time the viewport size would change we would need to recreate the pipeline.
After that we configure the rasterization stage:
pub const VkPipeline = struct {
    ...
    pub fn create(allocator: std.mem.Allocator, vkCtx: *const vk.ctx.VkCtx, createInfo: *const VkPipelineCreateInfo) !VkPipeline {
        ...
        const prsci = vulkan.PipelineRasterizationStateCreateInfo{
            .depth_clamp_enable = vulkan.Bool32.false,
            .rasterizer_discard_enable = vulkan.Bool32.false,
            .polygon_mode = .fill,
            .cull_mode = .{},
            .front_face = .clockwise,
            .depth_bias_enable = vulkan.Bool32.false,
            .depth_bias_constant_factor = 0,
            .depth_bias_clamp = 0,
            .depth_bias_slope_factor = 0,
            .line_width = 1,
        };
        ...
    }
    ...
};
**File: src/eng/vk/vkPipeline.zig**
Description of the parameters:
depth_clamp_enable: It controls if depth values should be clamped or not.rasterizer_discard_enable: When set to true it will stop after vertex processing and will not perform rasterization or fragment processing. It can be used when processing vertices for geometry calculations. We will not use this feature so we will set up to false.polygon_mode: It specifies how triangles should be rendered: In our case we want the triangles to be filled up with the color assigned in the fragments. For example, if we want to draw it as lines (as in OpenGL, the equivalent would be to use this line:glPolygonMode(GL_FRONT_AND_BACK, GL_LINE )) we should useline(VK_POLYGON_MODE_LINE)).cull_mode: This is used if we want to apply culling (for example, not drawing triangles that are in the inner parts of models). By now we are not applying culling, but we can activate it according to the orientation of the vertices of the triangles.front_face: It specifies how front face for culling is determined. In our case, we set toclockwise(VK_FRONT_FACE_CLOCKWISE), that is, if the vertices are drawn in clockwise order they are considered as clock wise.line_width: It specifies the width of the rasterized fragments.depth_bias_enable,depth_bias_constant_factor,depth_bias_clamp,depth_bias_slope_factor: These parameters control how to add a bias to depth values. We will not use this feature, but sometimes is used when using shadow maps to add a little displacement to depth values to adjust light occlusion calculations.
The next step is to define how multi-sampling will be done. Multi-sampling is used in anti-aliasing to reduce the artifacts produced by the fact that pixels are discrete elements which cannot perfectly model continuous space. By taking multiple samples of adjacent fragments when setting the color of a pixel, borders are smoothed and the quality of the images is often better. This is done by creating a PipelineMultisampleStateCreateInfo structure. In this case we are not using multiple samples so we just set the number of samples to one bit and disable all the flags:
pub const VkPipeline = struct {
    ...
    pub fn create(allocator: std.mem.Allocator, vkCtx: *const vk.ctx.VkCtx, createInfo: *const VkPipelineCreateInfo) !VkPipeline {
        ...
        const pmsci = vulkan.PipelineMultisampleStateCreateInfo{
            .rasterization_samples = .{ .@"1_bit" = true },
            .sample_shading_enable = vulkan.Bool32.false,
            .min_sample_shading = 0,
            .alpha_to_coverage_enable = vulkan.Bool32.false,
            .alpha_to_one_enable = vulkan.Bool32.false,
        };
        ...
    }
    ...
};
**File: src/eng/vk/vkPipeline.zig**
Pipelines are almost immutable, there are only a few things that we can modify once the pipeline has been created. We can change a fixed set of things, such as the view port size, the scissor region size, the blend constants, etc. We need to specify the values that could be changed dynamically. In our case, we do not want to recreate the pipeline if the window is resized, so we need to create a PipelineDynamicStateCreateInfo structure which sets the dynamic states that will be applied to viewport (VK_DYNAMIC_STATE_VIEWPORT) and scissor (VK_DYNAMIC_STATE_SCISSOR). By setting this, the view port and scissor dimensions are not set in the pipeline creation and we can change them dynamically.
pub const VkPipeline = struct {
    ...
    pub fn create(allocator: std.mem.Allocator, vkCtx: *const vk.ctx.VkCtx, createInfo: *const VkPipelineCreateInfo) !VkPipeline {
        ...
        const dynstate = [_]vulkan.DynamicState{ .viewport, .scissor };
        const pdsci = vulkan.PipelineDynamicStateCreateInfo{
            .flags = .{},
            .dynamic_state_count = dynstate.len,
            .p_dynamic_states = &dynstate,
        };
        ...
    }
    ...
};
**File: src/eng/vk/vkPipeline.zig**
The next step is to configure color blending. This stage allows combining the color of a fragment with the contents that already exists in that buffer. This allows to apply effects like transparencies:
pub const VkPipeline = struct {
    ...
    pub fn create(allocator: std.mem.Allocator, vkCtx: *const vk.ctx.VkCtx, createInfo: *const VkPipelineCreateInfo) !VkPipeline {
        ...
        const pcbas = vulkan.PipelineColorBlendAttachmentState{
            .blend_enable = if (createInfo.useBlend) vulkan.Bool32.true else vulkan.Bool32.false,
            .color_blend_op = .add,
            .src_color_blend_factor = .src_alpha,
            .dst_color_blend_factor = .one_minus_src_alpha,
            .alpha_blend_op = .add,
            .src_alpha_blend_factor = .src_alpha,
            .dst_alpha_blend_factor = .zero,
            .color_write_mask = .{ .r_bit = true, .g_bit = true, .b_bit = true, .a_bit = true },
        };

        const pcbsci = vulkan.PipelineColorBlendStateCreateInfo{
            .logic_op_enable = vulkan.Bool32.false,
            .logic_op = .copy,
            .attachment_count = 1,
            .p_attachments = &[_]vulkan.PipelineColorBlendAttachmentState{pcbas},
            .blend_constants = [_]f32{ 0, 0, 0, 0 },
        };

        const formats = [_]vulkan.Format{createInfo.colorFormat};
        const renderCreateInfo = vulkan.PipelineRenderingCreateInfo{
            .color_attachment_count = 1,
            .p_color_attachment_formats = &formats,
            .view_mask = 0,
            .depth_attachment_format = vulkan.Format.undefined,
            .stencil_attachment_format = vulkan.Format.undefined,
        };
        ...
    }
    ...
};
**File: src/eng/vk/vkPipeline.zig**
We need first to configure the blending options for the output attachment through a buffer of PipelineColorBlendAttachmentState structures. For now, we will not be playing with the settings that support transparencies, we just need to setup the colors that will be enabled for writing by setting the color_write_mask attribute. In our case we simply enable all the color channels. Then we need to group all those configurations on a PipelineColorBlendStateCreateInfo structure (this structure also defines other parameters to setup global blending settings).
After this we need to define how to read your vertex buffers and transform them into vertex shader inputs. We use the format defined in createInfo:
pub const VkPipeline = struct {
    ...
    pub fn create(allocator: std.mem.Allocator, vkCtx: *const vk.ctx.VkCtx, createInfo: *const VkPipelineCreateInfo) !VkPipeline {
        ...
        const pvisci = vulkan.PipelineVertexInputStateCreateInfo{
            .vertex_binding_description_count = 1,
            .p_vertex_binding_descriptions = @ptrCast(&createInfo.vtxBuffDesc.binding_description),
            .vertex_attribute_description_count = @intCast(createInfo.vtxBuffDesc.attribute_description.len),
            .p_vertex_attribute_descriptions = createInfo.vtxBuffDesc.attribute_description.ptr,
        };
        ...
    }
    ...
};
**File: src/eng/vk/vkPipeline.zig**
While rendering we may to pass additional parameters to the shaders (for example by using uniforms), those parameters need to be associated to a binding point. Even though we are still not using those features, we need to create the structure that will hold these definitions:
pub const VkPipeline = struct {
    ...
    pub fn create(allocator: std.mem.Allocator, vkCtx: *const vk.ctx.VkCtx, createInfo: *const VkPipelineCreateInfo) !VkPipeline {
        ...
        const pipelineLayout = try vkCtx.vkDevice.deviceProxy.createPipelineLayout(&.{
            .flags = .{},
            .set_layout_count = 0,
            .p_set_layouts = null,
            .push_constant_range_count = 0,
            .p_push_constant_ranges = null,
        }, null);
        ...
    }
    ...
};
**File: src/eng/vk/vkPipeline.zig**
Now we have all the information required to create the pipeline. We just need to set a GraphicsPipelineCreateInfo structure:
pub const VkPipeline = struct {
    ...
    pub fn create(allocator: std.mem.Allocator, vkCtx: *const vk.ctx.VkCtx, createInfo: *const VkPipelineCreateInfo) !VkPipeline {
        ...
        const gpci = vulkan.GraphicsPipelineCreateInfo{
            .flags = .{},
            .stage_count = @intCast(createInfo.modulesInfo.len),
            .p_stages = pssci.ptr,
            .p_vertex_input_state = &pvisci,
            .p_input_assembly_state = &piasci,
            .p_tessellation_state = null,
            .p_viewport_state = &pvsci,
            .p_rasterization_state = &prsci,
            .p_multisample_state = &pmsci,
            .p_depth_stencil_state = null,
            .p_color_blend_state = &pcbsci,
            .p_dynamic_state = &pdsci,
            .layout = pipelineLayout,
            .subpass = 0,
            .base_pipeline_handle = .null_handle,
            .base_pipeline_index = -1,
            .p_next = @constCast(&renderCreateInfo),
        };

        var pipeline: vulkan.Pipeline = undefined;
        _ = try vkCtx.vkDevice.deviceProxy.createGraphicsPipelines(
            .null_handle,
            @ptrCast(&gpci),
            null,
            @ptrCast(&pipeline),
        );

        return .{ .pipeline = pipeline, .pipelineLayout = pipelineLayout };
    }
    ...
};
**File: src/eng/vk/vkPipeline.zig**
The create function is now finished. To complete the VkPipeline struct we just need to define a cleanup function for destroying the resources:
pub const VkPipeline = struct {
    ...
    pub fn cleanup(self: *VkPipeline, vkCtx: *const vk.ctx.VkCtx) void {
        vkCtx.vkDevice.deviceProxy.destroyPipeline(self.pipeline, null);
        vkCtx.vkDevice.deviceProxy.destroyPipelineLayout(self.pipelineLayout, null);
    }
};
**File: src/eng/vk/vkPipeline.zig**
Using the pipeline
We are now ready to put all the pieces together and render something to the screen. We will start from our Game struct. We will create a sample model in the init function which was previously empty:
const Game = struct {
...
pub fn init(self: *Game, engCtx: *eng.engine.EngCtx, arenaAlloc: std.mem.Allocator) !eng.engine.InitData {
...
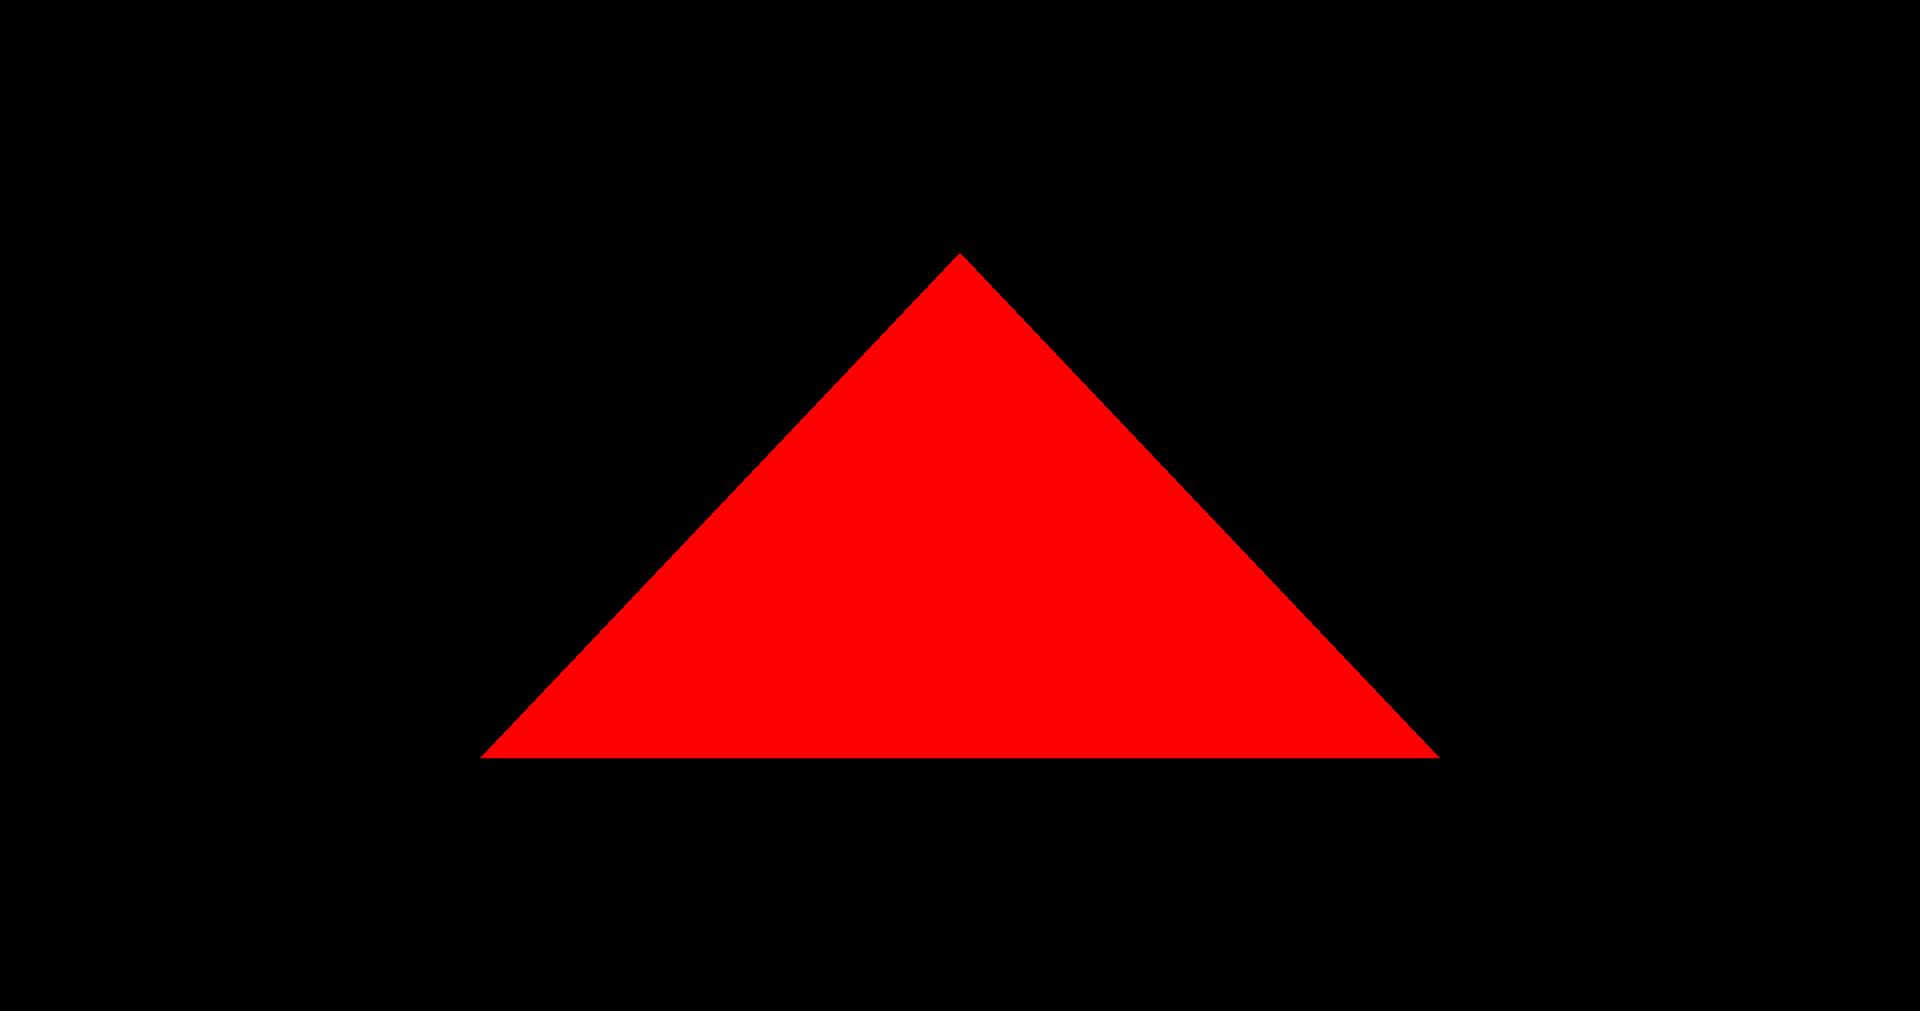
const triangleModel = eng.mdata.ModelData{
.id = "TriangleModel",
.meshes = &[_]eng.mdata.MeshData{
.{
.id = "TriangleMesh",
.vertices = &[_]f32{ -0.5, -0.5, 0.0, 0.0, 0.5, 0.0, 0.5, -0.5, 0.0 },
.indices = &[_]u32{ 0, 1, 2 },
},
},
};
const models = try arenaAlloc.alloc(eng.mdata.ModelData, 1);
models[0] = triangleModel;
return .{ .models = models };
}
...
};
**File: src/main.zig**We create a new instance of the MeshData struct that define the vertices and the indices of a triangle. We also create a model with a unique identifier, which will be used later on to link entities with the associated model. In addition, we have modified init signature by returning eng.engine.InitData which basically just contains the list of models that we want to load (it is defined inside the src/eng/eng.zig file):
pub const InitData = struct {
    models: []const eng.mdata.ModelData,
};
**File: src/eng/eng.zig**
We will modify the Engine struct to retrieve the InitData instance and pass it to the Render struct in the init function:
pub fn Engine(comptime GameLogic: type) type {
    ...
        fn init(self: *Engine(GameLogic)) !void {
            var arena = std.heap.ArenaAllocator.init(self.engCtx.allocator);
            const arenaAlloc = arena.allocator();
            defer arena.deinit();

            const initData = try self.gameLogic.init(&self.engCtx, arenaAlloc);
            try self.render.init(self.engCtx.allocator, &initData);
        }

        pub fn run(self: *Engine(GameLogic)) !void {
            try self.init();
            ...
        }
    ...
};
**File: src/eng/eng.zig**
We need now to update the Render struct to instantiate ModelsCache struct and define the init function:
pub const Render = struct {
    ...
    modelsCache: eng.mcach.ModelsCache,
    ...
    pub fn cleanup(self: *Render, allocator: std.mem.Allocator) !void {
        ...
        self.modelsCache.cleanup(allocator, &self.vkCtx);
        ...
    }

    pub fn create(allocator: std.mem.Allocator, io: std.Io, constants: com.common.Constants, window: sdl3.video.Window) !Render {
        ...
        const modelsCache = eng.mcach.ModelsCache.create(allocator);

        return .{
            ...
            .modelsCache = modelsCache,
            ...
        };
        ...
    }

    pub fn init(self: *Render, allocator: std.mem.Allocator, initData: *const eng.engine.InitData) !void {
        try self.modelsCache.init(allocator, &self.vkCtx, &self.cmdPools[0], self.queueGraphics, initData);
    }

    pub fn render(self: *Render, engCtx: *eng.engine.EngCtx) !void {
        ...
        try self.renderScn.render(&self.vkCtx, vkCmdBuff, &self.modelsCache, imageIndex);
        ...
    }
}
**File: src/eng/render.zig**
The render function has been changed also, we will pass the ModelsCache instance to the RenderScn instance so they can be used to render them. we need also to update the cleanup function to properly free the ModelsCache instance.
Rendering the triangle
In order to render a triangle we need to put everything in place in RenderScn struct. Let's start with the attributes, the cleanup and create functions:
pub const RenderScn = struct {
    vkPipeline: vk.pipe.VkPipeline,

    pub fn cleanup(self: *RenderScn, allocator: std.mem.Allocator, vkCtx: *const vk.ctx.VkCtx) void {
        _ = allocator;
        self.vkPipeline.cleanup(vkCtx);
    }

    pub fn create(allocator: std.mem.Allocator, io: std.Io, vkCtx: *const vk.ctx.VkCtx) !RenderScn {
        // Shader modules
        var arena = std.heap.ArenaAllocator.init(std.heap.page_allocator);
        defer arena.deinit();
        const vertCode align(@alignOf(u32)) = try com.utils.loadFile(arena.allocator(), io, "res/shaders/scn_vtx.glsl.spv");
        const vert = try vkCtx.vkDevice.deviceProxy.createShaderModule(&.{
            .code_size = vertCode.len,
            .p_code = @ptrCast(@alignCast(vertCode)),
        }, null);
        defer vkCtx.vkDevice.deviceProxy.destroyShaderModule(vert, null);

        const fragCode align(@alignOf(u32)) = try com.utils.loadFile(arena.allocator(), io, "res/shaders/scn_frg.glsl.spv");
        const frag = try vkCtx.vkDevice.deviceProxy.createShaderModule(&.{
            .code_size = fragCode.len,
            .p_code = @ptrCast(@alignCast(fragCode)),
        }, null);
        defer vkCtx.vkDevice.deviceProxy.destroyShaderModule(frag, null);

        const modulesInfo = try allocator.alloc(vk.pipe.ShaderModuleInfo, 2);
        modulesInfo[0] = .{ .module = vert, .stage = .{ .vertex_bit = true } };
        modulesInfo[1] = .{ .module = frag, .stage = .{ .fragment_bit = true } };
        defer allocator.free(modulesInfo);

        // Pipeline
        const vkPipelineCreateInfo = vk.pipe.VkPipelineCreateInfo{
            .colorFormat = vkCtx.vkSwapChain.surfaceFormat.format,
            .modulesInfo = modulesInfo,
            .useBlend = false,
            .vtxBuffDesc = .{
                .attribute_description = @constCast(&VtxBuffDesc.attribute_description)[0..],
                .binding_description = VtxBuffDesc.binding_description,
            },
        };
        const vkPipeline = try vk.pipe.VkPipeline.create(allocator, vkCtx, &vkPipelineCreateInfo);

        return .{
            .vkPipeline = vkPipeline,
        };
    }
    ...
};
**File: src/eng/renderScn.zig**
We will store the reference to the pipeline used by this render as an attribute and free it in the cleanup function. In the create function we just gather the compiled shaders and create shader modules for each of them. For the pipeline creation information we set the color format as the one used in our surface since we will be rendering directly to swap chain images. We will use the vertex format description defined in the VtxBuffDesc struct and create the pipeline.
We have created a function named loadFile in the src/eng/com/utils.zig file which needs to be included in mod.zig: pub const utils = @import("utils.zig");. The function just loads the binary contents of a compiled shader:
const com = @import("mod.zig");
const std = @import("std");

const log = std.log.scoped(.utils);

pub fn loadFile(allocator: std.mem.Allocator, io: std.Io, filePath: []const u8) ![]u8 {
    const buf = try std.Io.Dir.cwd().readFileAlloc(io, filePath, allocator, .unlimited);
    return buf;
}
**File: src/eng/com/utils.zig**
Now we need to update the RenderScn render function:
pub const RenderScn = struct {
    ...
    pub fn render(self: *RenderScn, vkCtx: *const vk.ctx.VkCtx, vkCmd: vk.cmd.VkCmdBuff, modelsCache: *const eng.mcach.ModelsCache, imageIndex: u32) !void {
        const cmdHandle = vkCmd.cmdBuffProxy.handle;
        const device = vkCtx.vkDevice.deviceProxy;

        const renderAttInfo = vulkan.RenderingAttachmentInfo{
            .image_view = vkCtx.vkSwapChain.imageViews[imageIndex].view,
            .image_layout = vulkan.ImageLayout.attachment_optimal_khr,
            .load_op = vulkan.AttachmentLoadOp.clear,
            .store_op = vulkan.AttachmentStoreOp.store,
            .clear_value = vulkan.ClearValue{ .color = .{ .float_32 = .{ 0.0, 0.0, 0.0, 1.0 } } },
            .resolve_mode = vulkan.ResolveModeFlags{},
            .resolve_image_layout = vulkan.ImageLayout.attachment_optimal_khr,
        };

        const extent = vkCtx.vkSwapChain.extent;
        const renderInfo = vulkan.RenderingInfo{
            .render_area = .{ .extent = extent, .offset = .{ .x = 0, .y = 0 } },
            .layer_count = 1,
            .color_attachment_count = 1,
            .p_color_attachments = &[_]vulkan.RenderingAttachmentInfo{renderAttInfo},
            .view_mask = 0,
        };

        device.cmdBeginRendering(cmdHandle, @ptrCast(&renderInfo));

        device.cmdBindPipeline(cmdHandle, vulkan.PipelineBindPoint.graphics, self.vkPipeline.pipeline);

        const viewPort = [_]vulkan.Viewport{.{
            .x = 0,
            .y = @as(f32, @floatFromInt(extent.height)),
            .width = @as(f32, @floatFromInt(extent.width)),
            .height = -1.0 * @as(f32, @floatFromInt(extent.height)),
            .min_depth = 0,
            .max_depth = 1,
        }};
        device.cmdSetViewport(cmdHandle, 0, &viewPort);
        const scissor = [_]vulkan.Rect2D{.{
            .offset = vulkan.Offset2D{ .x = 0, .y = 0 },
            .extent = vulkan.Extent2D{ .width = extent.width, .height = extent.height },
        }};
        device.cmdSetScissor(cmdHandle, 0,  &scissor);

        const offset = [_]vulkan.DeviceSize{0};
        var iter = modelsCache.modelsMap.valueIterator();
        while (iter.next()) |vulkanRef| {
            for (vulkanRef.meshes.items) |mesh| {
                device.cmdBindIndexBuffer(cmdHandle, mesh.buffIdx.buffer, 0, vulkan.IndexType.uint32);
                device.cmdBindVertexBuffers(cmdHandle, 0, @ptrCast(&mesh.buffVtx.buffer), &offset);
                device.cmdDrawIndexed(cmdHandle, @as(u32, @intCast(mesh.numIndices)), 1, 0, 0, 0);
            }
        }

        device.cmdEndRendering(cmdHandle);
    }
};
**File: src/eng/renderScn.zig**
Once we have started recording, we call to the cmdBindPipeline function. Once bound, the next commands that are recorded will be affected by this pipeline. The vulkan.PipelineBindPoint.graphics parameter (VK_PIPELINE_BIND_POINT_GRAPHICS) specifies that this refers to graphics binding point. Graphic commands will be affected by this binding, but compute commands are only affected by pipelines bound using the vulkan.PipelineBindPoint.compute (VK_PIPELINE_BIND_POINT_COMPUTE) binding point. Then we define the view port. The x and y values define the screen coordinates of upper left corner of the view port, which dimensions are completed by specifying its width and height. The min_depth and max_depth values define the range of valid depth values for the view port (any depth value outside that range will be discarded). You may have noted something weird about the view port definition. The upper left corner uses a negative value for the y-axis and the height value is also negative. This is because in Vulkan the origin of coordinates is at the top left and the y axis points downwards (the opposite of OpenGL). Personally, I'm used to the OpenGL coordinates system, the shaders, the models that I use are "adapted" to that coordinate system. This is why I prefer to flip the view port to keep on using models that assume that the y -axis point upwards. You can find more details here.

Another important thing to keep in mind is that the min_depth and max_depth values shall be in the range [0.0,1.0] unless the extension VK_EXT_depth_range_unrestricted is enabled. (This should be addressed when dealing with projection matrices).
After that, we define the scissor, which dimensions are set to the size of the full screen. In this case we do not need to flip anything, the coordinates and dimensions are relative to the view port. After that we can record the rendering of the models.
We iterate over all the models, then over their meshes and start by binding their vertices buffer by calling the cmdBindVertexBuffers. The next draw calls will use that data as an input. We also bind the buffer that holds the indices by calling the cmdBindIndexBuffer and finally we record the drawing of the vertices using those indices by calling the cmdDrawIndexed. After that, we finalize the render pass and the recording.
Shaders code
There's still a very important task to do to render anything, we need to code the shaders themselves. We will create a vertex and a fragment shaders. The source code of the vertex shader is:
#version 450

layout(location = 0) in vec3 inPos;

void main()
{
    gl_Position = vec4(inPos, 1);
}
**File: res/shaders/scn_vtx.glsl**
Our vertices just define a single attribute, at location 0, for the positions, and we just return that.
The source code of the fragment shader is:
#version 450

layout(location = 0) out vec4 outFragColor;

void main()
{
    outFragColor = vec4(1, 0, 0, 1);
}
**File: res/shaders/scn_frg.glsl**
By now, we just return a red color.
With all these changes, after many chapters, we are now able to see a nice triangle on the screen: